Getting started
Registering
Open your WarmDesk URL in a browser. If public registration is enabled you will see a Register link on the login page. Fill in a username, display name, email address, and password and click Register. You are logged in immediately.
If registration is not available, ask an administrator to create an account for you.
Logging in
Enter your username and password. WarmDesk issues a short-lived JWT access token (15 minutes) and a 7-day refresh token that keeps you logged in as long as your browser tab is open.
Forgotten password
Click Forgot password? on the login page and enter your email address. If an account with that address exists, a reset link is sent immediately. The link is valid for one hour.
Multi-factor authentication (MFA)
You can enable TOTP-based MFA from Settings → Security. Scan the QR code with an authenticator app (Aegis, Authy, Google Authenticator, etc.) and enter the 6-digit code to confirm. Once enabled, every login requires the one-time code after the password.
Interface overview
The sidebar on the left contains:
Dashboard — all your starred and recently visited projects
Projects — full project list with customer filter
Messages — direct messages and group chats
Reports — time tracking and reporting
Admin — admin panel (admin users only)
Settings — your profile and preferences
The notification bell in the top bar shows unread @mentions and card updates.
Projects
Creating a project
Click New Project from the dashboard or the projects list. Choose a name (the URL slug is derived automatically), a board type (Kanban or Scrum), and optionally assign a customer.
Board types
Kanban — columns you define, cards flow freely between columns. Suitable for continuous-flow work.
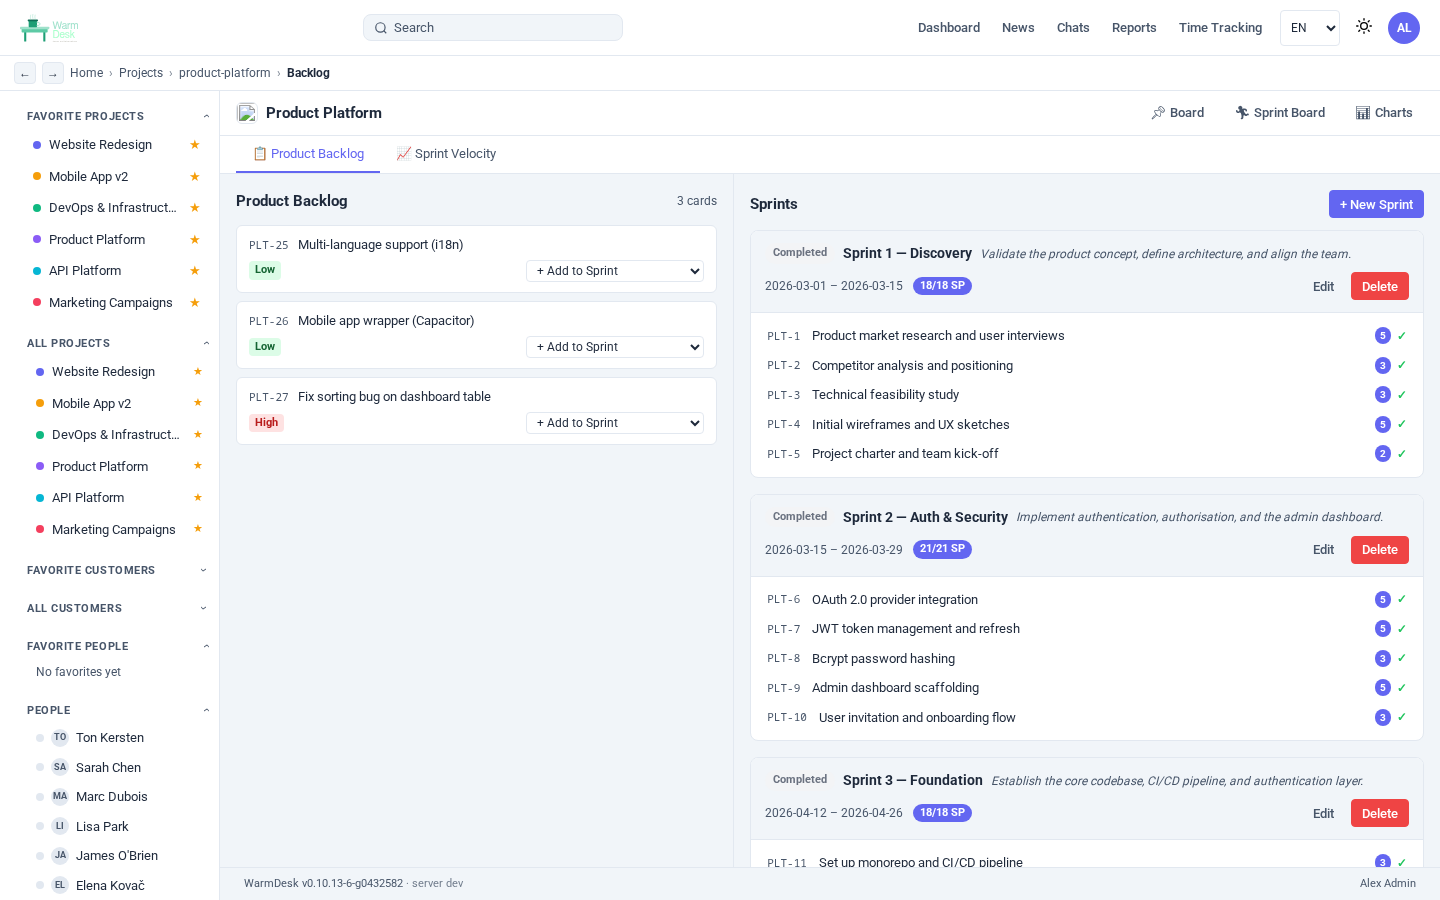
Scrum — same column structure but with sprints, a backlog, and story points. Adds a sprint panel in the sidebar for planning and tracking.
Starring and ordering
Star a project with the ⭐ icon to pin it to the top of your dashboard. Drag project cards on the dashboard to reorder them. Filter by customer using the dropdown at the top.
Kanban board
Columns
Add columns with + Add Column in the board toolbar (project admins and owners). Double-click a column title to rename it; drag the column header to reorder; remove an empty column with the trash icon.
Open Column settings (⚙) on a column header to change its colour and optional WIP limit (maximum cards).
The header shows count versus limit (for example 3 / 5); it is emphasized when the column is at or over the limit.
Leave the limit empty to turn off WIP tracking.
You can also set an optional WIP limit when creating a new column.
Cards
Click + Add card at the bottom of a column to create a new card. Drag cards between columns and within a column to reorder them. Click a card title to open the card detail panel.
Scrum extras
In Scrum projects, a Sprint panel appears in the left sidebar. Create a sprint, drag backlog cards into it, and click Start Sprint to begin. When a sprint ends, incomplete cards are moved back to the backlog.
Charts
Click 📊 Charts in the board toolbar to open the analytics view. Kanban projects include four charts:
| Chart | What it shows |
|---|---|
CFD (Cumulative Flow Diagram) | Daily card counts per column over the selected period. A widening band for a column signals growing WIP or a blocked stage. |
Cycle Time | Distribution of how long each card spent in progress — from the moment it first left the starting column until it was closed. |
Lead Time | Distribution of total time from card creation to closure, including any waiting time in the initial column. |
Throughput | Number of cards closed per week over the selected period — a direct measure of delivery rate. |
Use the time-range selectors at the top of each chart to adjust the window.
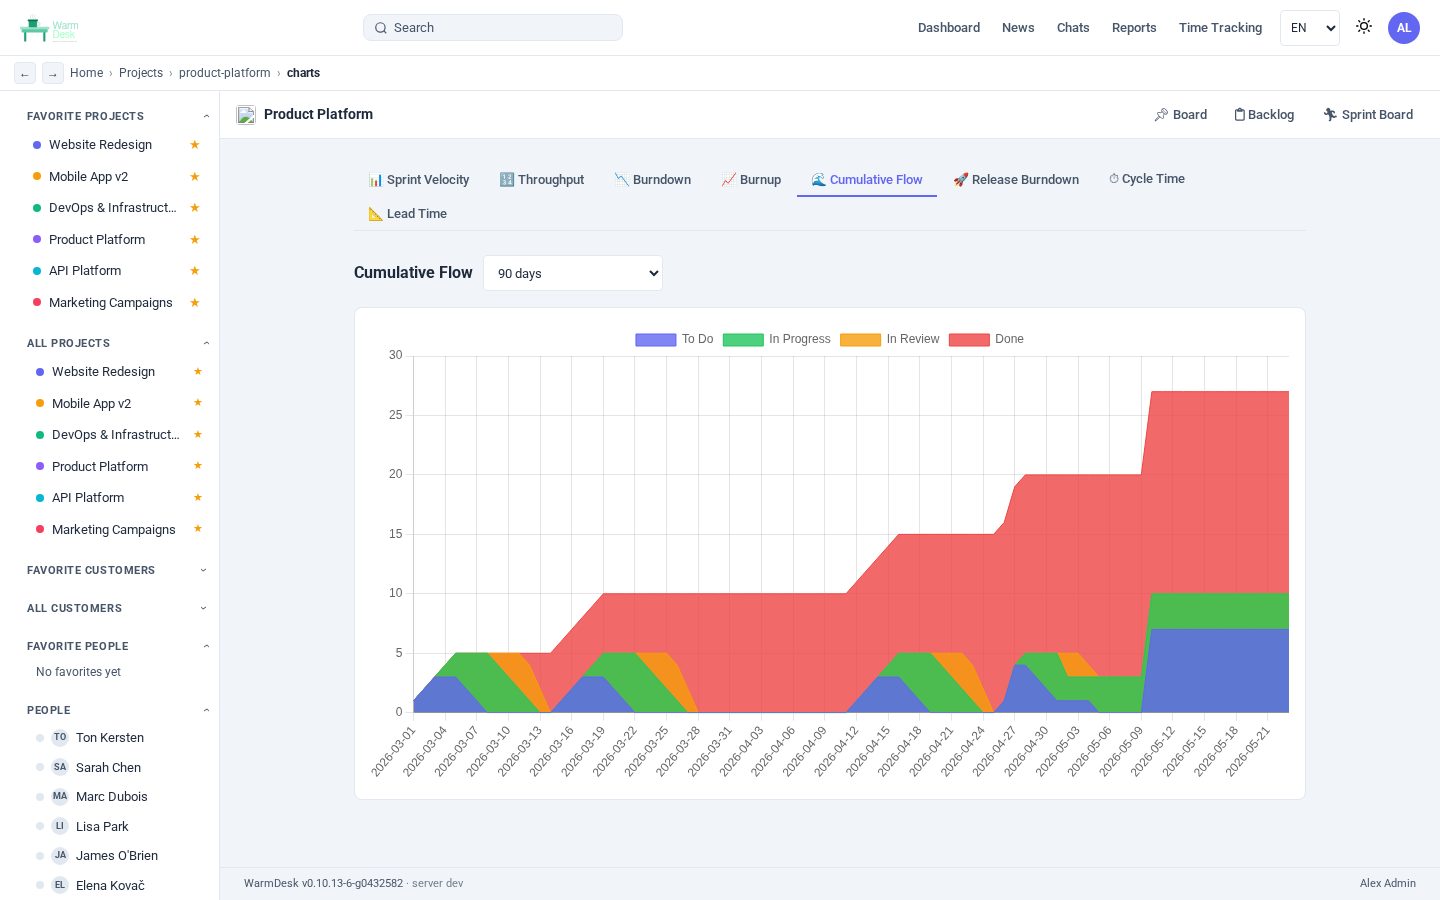
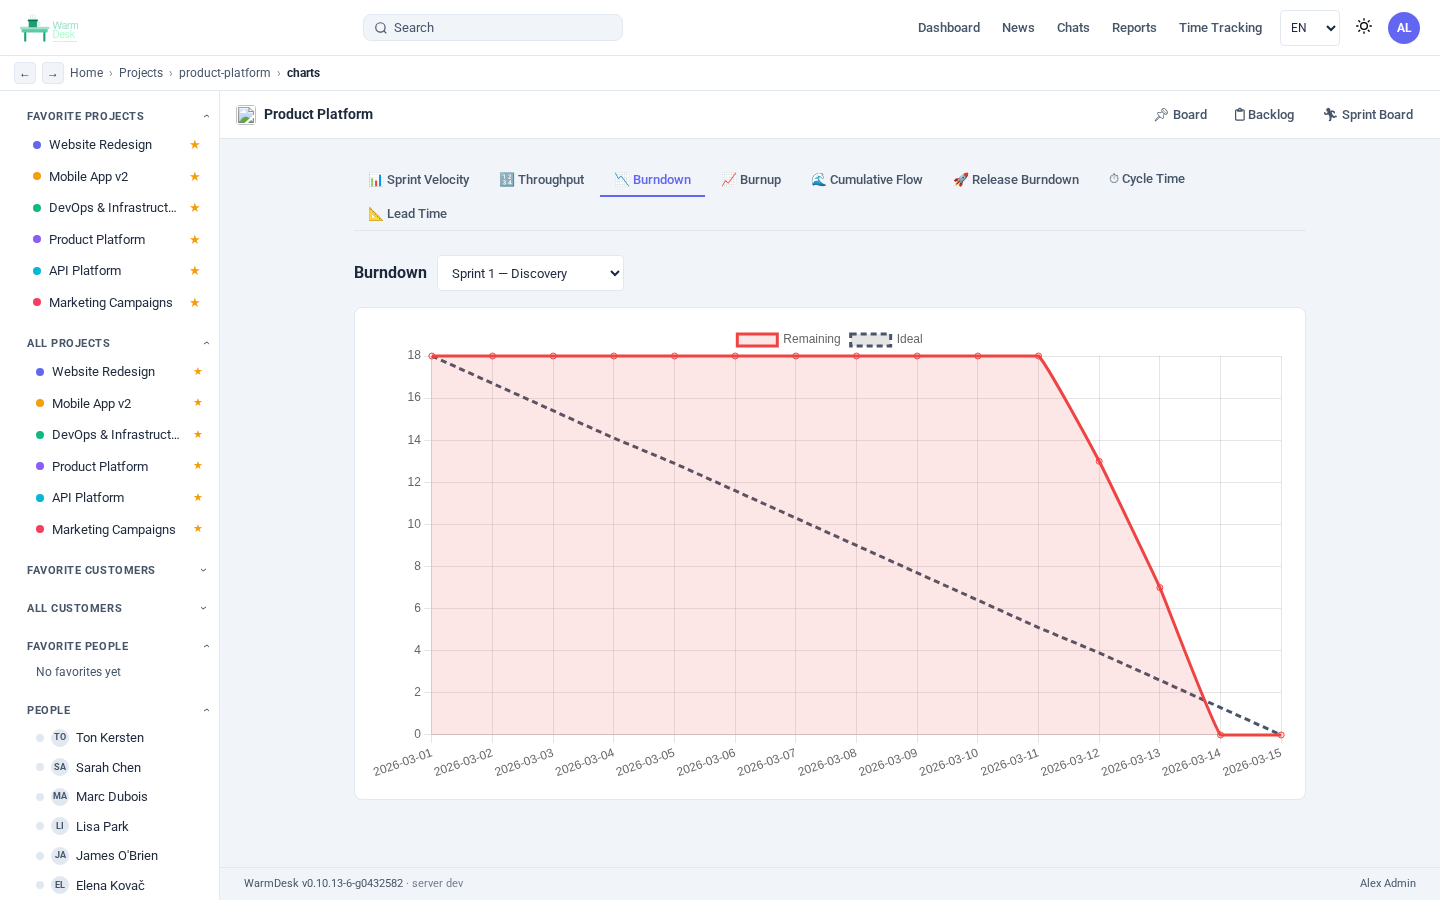
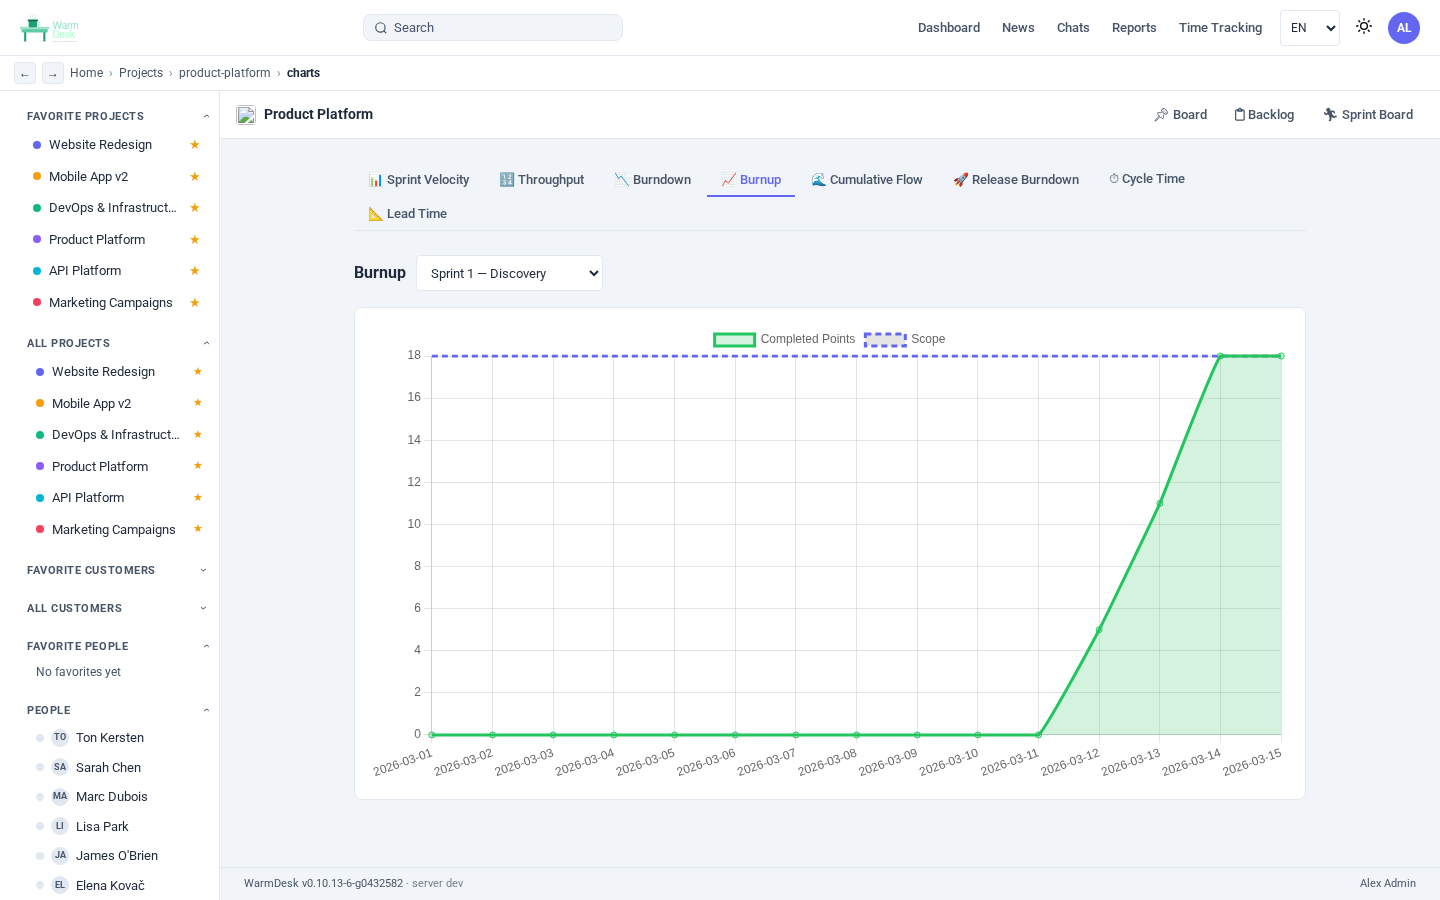
Scrum projects add four additional charts:
| Chart | What it shows |
|---|---|
Velocity | Story points completed per sprint — helps forecast future sprint capacity. |
Burndown | Remaining story points versus the ideal burn line; shows whether the sprint is on track. |
Burnup | Work completed versus total scope — useful for visualising scope creep mid-sprint. |
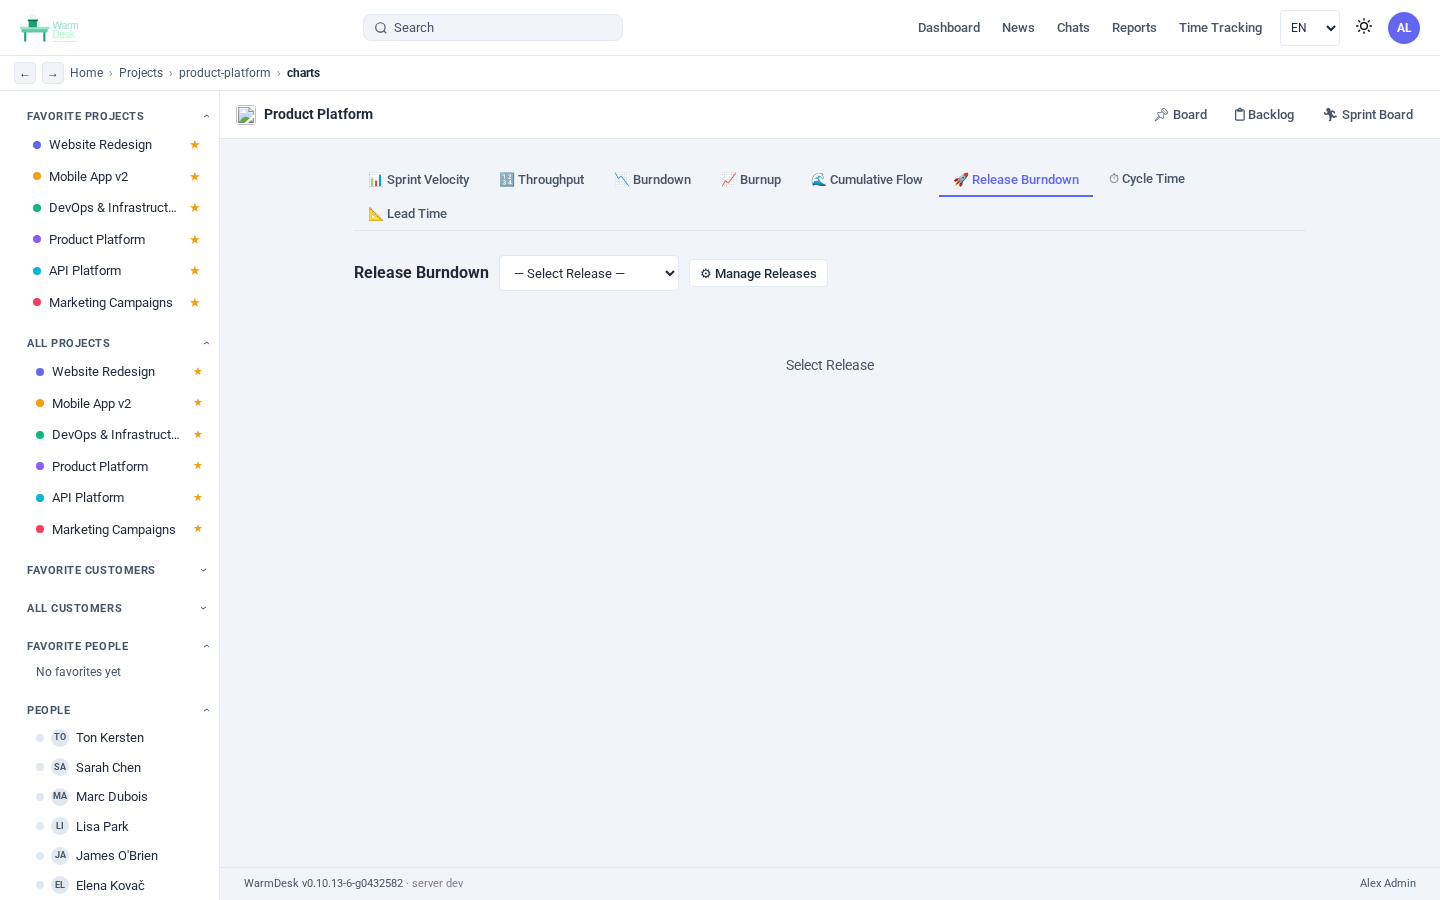
Release Burndown | Progress across all sprints in a release; shows remaining scope toward the release goal. |
Cards
A card is the basic unit of work. Open any card to access its full set of fields.
Basic fields
Title — required, short description of the work
Description — full Markdown description with live preview
Priority — none / low / medium / high (colour-coded)
Due date / Start date
Assignees — one or more team members; their avatars appear on the board
Labels — colour-coded tags defined per project (manage in Project Settings)
Story points — for Scrum velocity tracking
Checklist
Add checklist items from the Checklist tab.
Each item has its own checkbox; the card header shows a completion ratio (e.g. 3/5).
Comments and time logging
Add a comment in the Comments tab. To log time on the same comment, fill in the Time spent (minutes) field. Logged time appears in the time report.
File attachments
Drag files or click Attach to upload. Images are displayed inline; other file types appear as download links. MIME type is detected server-side; the client-supplied content type is ignored.
Relationships
Sub-cards — create child cards for hierarchical decomposition
Cross-references — link any two cards across projects with a relates-to badge
Git links — commits, pull requests, and issues from GitHub, GitLab, Gitea, or Forgejo (added automatically via webhooks or manually)
Watchers
Add yourself or colleagues as watchers to receive notifications when the card is updated.
Card numbers
Every card gets a sequential number like PRJ-42.
Type this number in any chat message or comment to generate a clickable badge that opens the card.
Topics (threaded discussions)
Each project has a Topics board alongside the Kanban board. Topics are threaded discussion threads — good for design decisions, meeting notes, and async conversations that don’t map to a single card.
Pin a topic to keep it at the top
Reply to any topic to add a response
Edit or delete your own topics and replies
Team chat
Project chat
Every project has a persistent chat channel accessible from the Chat tab in the project. All project members can read and post.
Direct messages
Click Messages in the sidebar to access direct messages and group chats.
Start a 1-on-1 conversation from any user’s profile. Create a group chat by selecting multiple users (or an entire project team). Group chats support a custom avatar and member management (add / remove participants).
Voice and video calls
WarmDesk supports two call modes in direct messages:
1:1 audio/video in one-on-one conversations (WebRTC peer-to-peer)
Group video calls in group conversations with 3 or more members (LiveKit)
In eligible group chats, use the video button in the header to join the room. If the server has not configured LiveKit yet, the chat shows a clear status banner so users know group video is currently unavailable on that instance.
Inviting people to an active call
While in any call, click the + button (add person icon) in the bottom controls bar to invite additional participants. A user picker lets you search by name and select one or more people. Each selected user receives a real-time popup with a Join button.
If you are in a 1:1 call, inviting someone upgrades the call automatically to a LiveKit group room — your existing call partner also receives the join popup. Users who are offline or decline simply do not appear in the room.
Markdown formatting in messages
File attachments — images shown inline, other files as links
Emoji reactions — react to any message; hover to see who reacted
@mentions — triggers a notification and highlights the name in the recipient’s view
Link previews — Open Graph metadata is fetched server-side
Layout options — bubble, comfortable, compact, cozy, or grouped (Discord-style)
Desktop notifications — enabled via the bell icon when your browser prompts
Notifications and @mentions
The notification bell in the top bar shows unread items. Click it to open the notification panel.
You receive a notification when:
Someone @mentions you in a card comment or chat message
A card you are watching is updated
A card assigned to you is moved or commented on
Time tracking
Logging time
Time can be logged in two ways:
On a card comment — fill in the Time spent field when adding a comment
Time sheet — go to Reports → Time Sheet, select the week, and click a cell to log hours for a project on a given day
Time report
Go to Reports to view a summary of time entries. Filter by date range, user, customer, and project. Export to PDF (browser print) or XLSX.
User settings
Open Settings from the sidebar or the top-right avatar menu.
| Setting | Options |
|---|---|
Theme | Light, Dark, System |
Language | 12 languages (en, nl, de, fr, es, da, sv, nb, fi, is, pt, it) |
Date / time format | Multiple regional formats |
Timezone | Any IANA timezone |
Font / font size | Several options for readability |
Sidebar position | Left or right |
Accent colour | Pick from presets or enter a hex value |
MFA | Enable / disable TOTP |
Personal API keys | Create keys for automation scripts |
Customers
If your organisation uses customer management:
All projects belong to a customer
Star a customer for quick access
View all projects and contracts for a customer from the customer detail page
Contracts track start and end dates
Search
The global search bar (shortcut: /) searches across:
Card titles and descriptions
Topics
Projects and customers
Search results are scoped to your accessible resources.